CBSE Class 6 Maths Notes Chapter 14 Practical Geometry PDF Download

CBSE Class 6 Maths Notes Chapter 14: Students are introduced to the fundamentals of geometric constructions in CBSE Class 6 Maths Notes Chapter 14 Practical Geometry, Practical Geometry. It explains how to precisely draw forms using instruments such as a set square, protractor, compass, and ruler.
Building circles, perpendicular lines, angles, and line segments are the main topics of this chapter. Using a protractor, students learn how to draw three different kinds of angles: right, acute, and obtuse. It also describes how to use a compass to split an angle and a line segment. This chapter emphasises accuracy and the value of building in mathematics while laying the groundwork for basic geometric skills.CBSE Class 6 Maths Notes Chapter 14 Overview
Building a solid foundation in geometric principles and construction procedures requires a thorough understanding of Chapter 14 of CBSE Class 6 Maths, which covers Practical Geometry. It teaches pupils how to draw exact shapes and figures using basic geometric tools such a set square, protractor, compass, and ruler. Building fundamental geometric shapes including circles, line segments, and angles is the main focus of this chapter. It also covers using a compass to bisect angles and line segments and to construct perpendiculars. Higher grade geometry topics that are more complex require an understanding of these ideas. This chapter aids in the development of students' practical drawing and visualisation skills, which are crucial in fields like architecture, engineering, and design. Gaining proficiency in these foundational concepts helps students become more adept at applying reasoning to mathematical issues and gets them ready for increasingly challenging ones.CBSE Class 6 Maths Notes Chapter 14 PDF
Below we have provided CBSE Class 6 Maths Notes Chapter 14 Practical Geometry for the ease of the students. Students can download this CBSE Class 6 Maths Notes Chapter 14 Practical Geometry pdf from the below link and access it without internet.CBSE Class 6 Maths Notes Chapter 14 PDF
CBSE Class 6 Maths Notes Chapter 14 Practical Geometry
Below is the CBSE Class 6 Maths Notes Chapter 14 Practical Geometry - With the aid of geometrical tools, it is simple to draw a line segment or measure one, draw a circle or arc, draw an angle, etc. Let's talk about the several geometric tools that are utilised in everyday geometry.| Name of Geometrical tool | Use of Geometrical tool |
| Divider | Comparing lengths. |
| Protractor | Measure as well as draw angles. |
| Set Squares | To draw parallel and perpendicular lines. |
| Compass | To draw circles, arcs, and to mark equal lengths. |
| Ruler | To measure lengths of the line segment and to draw a line segment. |
Points and Lines
Point: It is a location. Line: Collection of points in a linear manner that extends infinitely in two directions.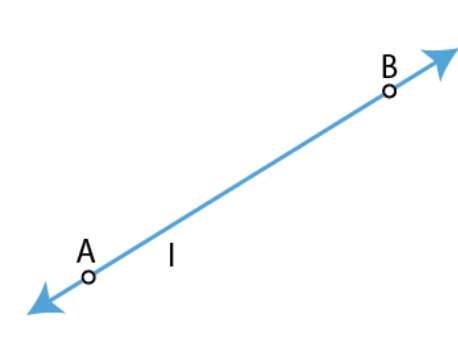
Tools of Construction
Tools used for construction: Ruler: A tool for drawing and measuring the lengths of lines. A compass is a tool with a pencil and a pointer on opposite ends. It's used for drawing circles and arcs, as well as marking equal lengths. Divider: Device with two points of reference. It is employed in length comparisons. Square Sets: Two triangular pieces: the angles at the vertices of one have 45°, 45°, and 90°, while the other has 30°, 60°, and 90°. It is employed for drawing perpendicular and parallel lines. A semicircular instrument with 180° divisions is called a protractor. Angles are drawn and measured using it.Line Segment
Line Segment: Part of a line that is bounded by two distinct endpoints.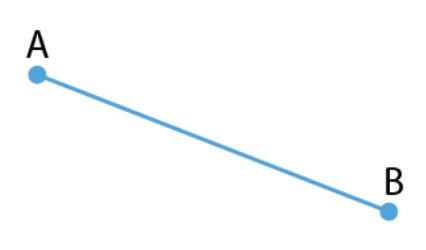
Constructing a Line Segment for a Given Length
Steps for constructing a line segment of a given length ‘a’: (i) Draw a line l and mark a point A on it. (ii) Set the compass on the ruler's starting point. Pencil point up to the "a" mark by opening it.
(iii) After positioning the cursor on A, cut l at B by drawing an arc. The necessary line segment is AB.
(ii) Set the compass on the ruler's starting point. Pencil point up to the "a" mark by opening it.
(iii) After positioning the cursor on A, cut l at B by drawing an arc. The necessary line segment is AB.
Constructing Copy of a Line Segment
How to use a ruler and compass to create a replica of a specified line segment: (i) Assuming AB has an unknown length. (ii) Place the pencil end on B and the compass pointer on A. The length of AB is now indicated via the instrument's opening. (iii) Sketch any line. (iv) Draw an arc that crosses l at a point, let's say D, with the pointer on C. Thus, CD = AB.Perpendiculars and Parallels
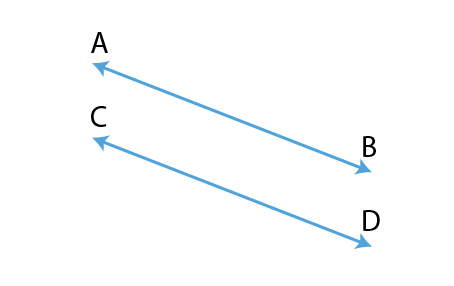
A line MN meeting another line AB at the right angle is said to be the perpendicular to the line AB. Two lines are considered parallel if they never cross one other and are always the same distance apart.
As AB || CD is depicted in the illustration.
Two lines are considered parallel if they never cross one other and are always the same distance apart.
As AB || CD is depicted in the illustration.
Constructing a Perpendiculars Using a Compass and a Ruler
The following are the steps to create perpendiculars with a ruler and compass: (i) Given a line I and a point P that is not on it. (ii) Draw an arc that crosses line I at points A and B, using P as the centre. (iii) Build two arcs with the same radius with A and B as their centres. The arcs should meet at a point on the other side, let's say Q. (iv) Acquire PQ. Consequently,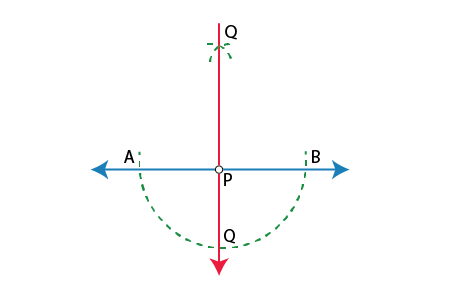
Constructing Perpendicular to a Line through a Point on the Line
How to build a perpendicular to a line that passes through a line point: (i) Align one of the edges of a ruler with the supplied line (l). (ii) Position a set square so that one of its edges is in line with the ruler's already aligned edge. (iii) Move the set square till the Point P and its right-angled corner line up. (iv) Sketch PQ so that it is perpendicular to l.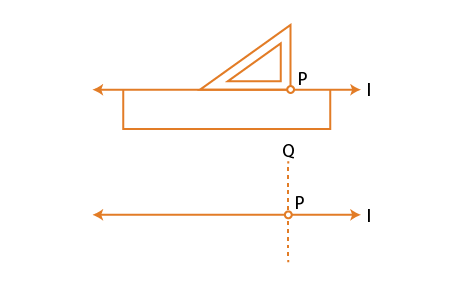
Paper Folding Construction
How to fold paper to create perpendiculars: (i) Assume P is a point outside of line l and l is the supplied line. (ii) Position a set-square so that one of its right angles' arms lines up with l. (iii) Move a ruler down the set-square's edge in the opposite direction of its right angle. (iv) Move the set-square along the ruler until point P makes contact with the set-square's other arm.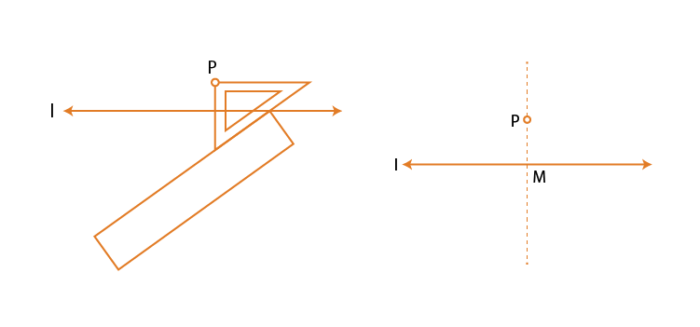
Circle
A circle is a set of all points in a plane that are equidistant from a point i.e. centre of the circle.Construction of a Circle for a Given Radius
Procedure for using a compass to draw a circle: (i) Set the compass to the necessary radius. (ii) Position the compass's pointer on O. (iii) To draw the circle, slowly rotate the compass.How to Construct an Angle?
Angle Bisector and Its Construction
Procedure for creating angle bisectors for a specified angle: (i) Draw an arc that intersects both rays at A and B using O as the centre. (ii) Draw an arc whose radius is greater than half the length of AB, using B as the centre. (iii) Cut an arc inside of ∠BOA using A as the centre and the same radius. (iv) Designate C as the intersection point. The angle bisector is then OC.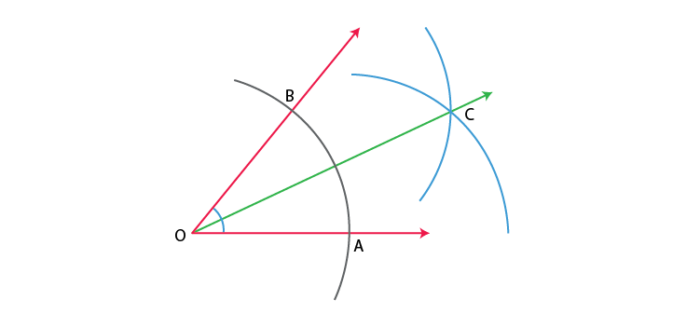
Angles
Angles: Formed by two rays sharing a common endpoint.
Benefits of CBSE Class 6 Maths Notes Chapter 14
The benefits of studying Practical Geometry in Chapter 14 of CBSE Class 6 Maths are numerous:Improves accuracy and precision : The chapter teaches students to draw geometric figures with accuracy, an essential skill in higher mathematics and other fields like engineering and architecture.
Develops practical skills : Learning to use tools like a ruler, compass, and protractor helps students develop hands-on skills that are applicable in real-world situations.
Strengthens logical thinking : Constructing geometric shapes and bisecting angles enhances students' problem-solving and logical reasoning abilities.
Foundation for advanced concepts : It forms the basis for more complex geometry topics in future classes, making it easier for students to understand and master advanced concepts.
Visual learning : The chapter encourages visual learning, helping students better grasp abstract mathematical ideas through hands-on constructions.
CBSE Class 6 Maths Notes Chapter 14 FAQs
What is practical geometry in maths class 6?
What I learn in the chapter practical geometry?
What is the introduction of practical geometry?
Who discovered practical geometry?